
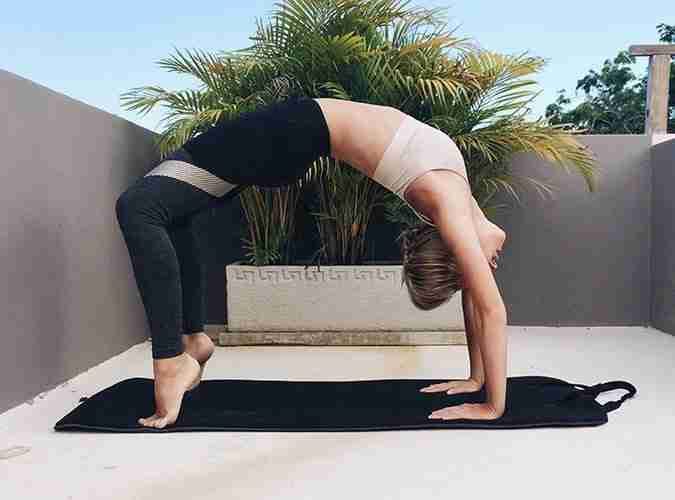
Can you do yoga after a hip replacement?
Yes. Should a total hip replacement keep you from practicing yoga? It should not. Most patients return to the mat, and the practice pays a new hip back generously — balance, flexibility, and hip and core strength are exactly what the joint needs for the long run. Many of Dr. Morton's patients in Honolulu are practicing again within a few months of surgery, with some adjustments early on so the new hip stays stable while strength and flexibility rebuild.
How cautious you need to be depends on your surgical approach. Dr. Morton performs most hip replacements through the muscle-sparing direct anterior approach, and those patients usually have no hip precautions at all — no standing rules against bending deeply or crossing the legs once healing is underway. Traditional posterior-approach patients are often given early precautions against deep flexion and internal rotation, which matter on a yoga mat more than almost anywhere else. Whichever approach you had, follow your own surgeon's instructions — they outrank any general guide, including this one. The good news is that the destination is the same either way: a durable hip and a full practice, rebuilt patiently.
One mindset shift is worth making before your first class back. Everyday life pushes us to work at 110 percent — to do our absolute best all the time, to push hard — and the yoga classroom is no exception, with instructors cueing students to "go deep." After a major surgery like a hip replacement, that cue deserves a pause, because pushing to your limits is not always good for the body or the mind; it can add stress to both. This is your opportunity to embrace the other side of yoga practice: less is more. Be consciously aware of the new limitations you will feel at first, learn which movements enhance healing and which hinder it, and set your intention on functional movement and alignment rather than depth. The starter poses below are built around exactly that principle.
When to start: around six to twelve weeks, with clearance
Most patients can return to a gentle, modified practice around six to twelve weeks after surgery, once the incision is fully healed, walking is comfortable, and their surgeon has cleared them at a follow-up visit. A fuller practice — deeper hip work, longer holds, more ambitious balance poses — typically builds over the first three to six months.
Two things should be true before your first class back. First, get the clearance in person, and talk through your specific regimen with your surgeon before starting. Many yoga practitioners are more flexible than the average joint-replacement patient — a great asset for the long run, but it means your flexibility can outrun your surgical healing early on, and depending on the approach used, certain positions may be limited, especially for the first six weeks. Timing also varies with how your recovery is going; the first-year recovery timeline shows where yoga fits among the other milestones. Most patients are walking unassisted and sleeping normally well before this window opens, so the mat tends to arrive when the body is ready for it. Second, tell your instructor about the new hip. A good teacher will offer modifications freely and won't press you toward end-range positions. Breath work, meanwhile, needs no clearance at all — it can start the week of surgery. If you practiced regularly before your hip wore out, expect the return to feel surprisingly familiar; if yoga is new to you, begin with a beginner or gentle class rather than adapting a faster one.
A pose progression that respects healing
Rebuild the practice in stages, letting each stage feel easy before you add the next.
Start with breath work and simple seated or supine poses, then add gentle standing poses — mountain, supported warrior variations, wide-legged forward folds to a comfortable depth. Next come balance poses such as tree pose, practiced beside a wall until single-leg stance feels boringly stable — and boring is exactly the goal in balance work this year. Deeper hip openers, longer holds, and more demanding transitions come last, usually in the three-to-six-month window.
Props are the honest yogi's best friend during this year: blocks bring the floor up to you, a strap extends your reach, and a chair turns many poses into safe versions of themselves. The goal in every stage is the same — work in the comfortable middle of your range and let the end range return gradually, rather than pulling yourself into it. A short daily practice beats a long weekly one during this phase — frequency rebuilds control and confidence faster than intensity does. And if a class moves faster than your hip wants to, opt out of a pose without apology — every experienced teacher expects it.

Five starter poses, step by step
These five standing postures are the ones Dr. Morton recommends first: common poses, each performed with a variation that puts safety and alignment ahead of depth. They train good posture and functional movement while strengthening and stretching the muscles a new hip depends on. Work through them with your doctor's and physical therapist's blessing as your practice resumes — Dr. Morton's team offers physical therapy at the Honolulu and Kunia clinics, so pose-by-pose coaching is close at hand.
1. Mountain pose
A standard yet remarkably effective posture for practicing alignment through the whole body. Stand near the top of your mat with your feet about hip-distance apart, toes pointing forward — adjust the stance until it feels comfortable. Feel both feet connect firmly to the ground with weight distributed evenly across both sides of the body. Keep your gaze forward and roll your shoulders back to lengthen the spine, and turn your palms to face forward to open the upper body. Hold for 10–20 slow, deep breaths, letting your body assimilate to the alignment you're practicing.
2. Extended mountain pose
From mountain pose, add one simple movement. Inhale fully and extend both arms overhead, treating it like a good stretch — feel it along the sides of the body and as length through the spine. Exhale to lower the arms back to your sides. Repeat five times. For more stability, engage your core on each exhale by drawing your navel inward toward your spine — the abdominal lock. That gentle activation supports the whole body, both in stationary poses like this one and while moving from pose to pose.
3. Half forward fold
Perform this one at a wall or the back of a sturdy chair for support. It stretches the hamstrings, lengthens the spine, and gently releases the hips without flexing past 90 degrees. Stand a few feet from the wall or chair, inhale your arms overhead, then exhale, soften your knees, and slowly fold forward until your hands rest on the support and your torso is just shy of parallel to the floor. Adjust until you can stay for several breaths, feeling length down the backs of the legs and along the sides of the body. The impact on the hip is minimal, but the benefit to the upper and lower body is real.
4. Tree pose
Tree pose builds balance and opens the hips gently. Stand with one side facing your wall or chair and carefully shift your weight into the outside foot, using the support to stabilize. Slowly slide the opposite foot up the standing leg — and be mindful of height. In many cases it's best to keep the toes on the floor with just the heel resting against the inside of the standing ankle, which keeps the lifted leg from bending more than 90 degrees. Turn the knee outward carefully; the outward rotation at the hip should be a minimal movement to stay safe. Hold for 5–10 breaths, then switch sides.
5. Warrior 2, short stance
Warrior 2 builds strength and agility in the hips and legs. Start in mountain pose, still using the wall or chair if you like. Step one foot back no more than two feet, turning that foot and leg outward about 45 degrees, and keep the back leg straight as you're able. Bend the front knee to less than 90 degrees, keeping the knee tracking over the heel or ankle bone for structural support. Extend the arms out over the legs, parallel to the ground. The deliberately short stance is what protects the hip from overstretching; you still open the upper body and hips safely, and the lunging front leg strengthens the quadriceps and outer hip. Hold for 5–10 breaths, then practice the other side.
Poses to modify early — what the research shows
Which poses deserve early caution depends on your approach — and this isn't guesswork. A study performed at the University of Arkansas examined common yoga poses and measured how far each pushes a replaced hip toward the positions that risk dislocation. The findings map neatly onto the two surgical approaches, because each has its own direction of vulnerability.
| Hip motion | Who should be most careful | Poses that load it |
|---|---|---|
| Deep flexion | Posterior-approach patients, especially early | Downward dog, standing forward fold, seated twist, pigeon |
| Extension | Anterior-approach patients (though their dislocation risk is much lower overall) | Warrior 1 and 2 in a full stance, crescent lunge, pigeon, triangle |
| Adduction (leg crossing the midline) | Both, early in recovery | Eagle, seated twist |
| Internal rotation | Posterior-approach patients in particular | Half-moon, eagle, triangle |
Notice that warrior 2 appears both here and in the starter list above — the stance length is the difference. In a full, deep stance the pose drives the back hip into extension; with the short stance Dr. Morton recommends, the same pose becomes a safe strength-builder. That is the pattern for almost every pose on this list: it isn't the shape that's risky, it's the depth.
A few poses ask a lot of any healing hip and are best rebuilt gradually regardless of approach: full lotus, pigeon on the operated side, frog, and deep squat holds such as malasana. None of these are banned forever — most patients work back into modified versions over the first year. The rule of thumb is simple: move into hip end-range slowly, never bounce or force, and let mild stretch — not pinch or pain — set the depth. When a pose is on your caution list, there is almost always a propped or half version that trains the same pattern safely — reclined pigeon with a strap instead of full pigeon, supported bridge instead of wheel.
Yoga and your hip, for the long haul
Once you're back, yoga is one of the best things you can do for a hip replacement: it maintains the balance that prevents falls, the flexibility that keeps daily life easy, and the strength that protects the joint. Dislocation of a modern hip replacement is uncommon — particularly after the anterior approach — and a sensibly progressed practice is not considered a meaningful threat to the implant. In fact, the falls that yoga helps prevent are a far bigger risk to hips — replaced or not — than any pose on this page.
Listen to the hip the morning after practice: lingering soreness means the last session reached too far, so step back a stage. Call the office at (808) 439-6201 for pain that worsens rather than eases, a sensation of instability, or any new limp. And if hip arthritis is what's shrinking your practice right now, a consultation with Dr. Morton can map the road from stiff and guarded back to a strong, quick recovery — and back to the mat.
Why yoga practitioners choose Dr. Morton
Returning to a practice you love is easier when your surgeon understands what you're returning to. Dr. Morton is a board-certified, fellowship-trained hip and knee surgeon who is well-versed in yoga techniques for recovering from hip replacement — and who understands the drive to get back to activity, not just back on your feet.
- Board-certified, fellowship-trained specialist in hip replacement surgery
- Nonoperative and operative treatments available — surgery only when it's the right answer
- High success rate with rapid-recovery, minimally invasive techniques
- Able to perform different approaches to the hip, including the muscle-sparing direct anterior approach that usually means no yoga-limiting precautions
- Certified on all four surgical robots — ROSA, Mako, CORI, and VELYS
- Physical therapy available through the Honolulu and Kunia clinics
- Clinics in Honolulu (Ala Moana), West O'ahu (Kunia), Hilo, and Kona — call (808) 439-6201
Medically reviewed by Paul Norio Morton, MD, FAAOS, FAAHKS. Last reviewed: . This article is for education only and isn’t a substitute for an exam and personalized advice — schedule a consultation to discuss your situation.