

Why yoga belongs in knee replacement recovery
After knee replacement surgery, once you've been cleared for physical activity, yoga is a wonderful resource to fold into your recovery regimen. Few practices develop physical strength, flexibility, and mobility so well at so many levels of ability — which is why the same discipline serves as a healing routine after surgery, a training component for conditioned athletes, and a tool for relaxation and meditation. Whatever the intention, yoga lets the practitioner tap into many aspects of the human condition and guides you toward a greater awareness of self, so you can reach your highest potential. That self-awareness is especially useful when you're recovering from surgery and relearning what your body can do.
One of the first things you'll be advised to do after knee replacement is regain mobility and strength. Full function of the knee joint — and appropriate supportive strength from the quadriceps, hamstrings, and calf muscles — is essential for a complete recovery. The goal is to straighten and bend your leg through an effective range of motion so you can regain your independence and return to the things you love to do.
Five poses — and one rule about intensity
Dr. Morton recommends adding these five postures to your therapeutic regimen:
- Warrior Two — a lunge that strengthens the quadriceps
- Tree Pose — standing balance work
- Bridge Pose — activates glutes, hamstrings, and hip flexors
- Child's Pose — gentle knee range of motion plus relaxation
- Savasana — the resting pose that closes every practice
Before you begin, one rule: mind the intensity. If you're a regular yogi who previously kept a dynamic practice, you will need to work at a lower intensity for now to protect your recovery and avoid a new injury. Every pose below can be performed with modifications and assistive props — a wall, a sturdy chair, a walker, blocks, blankets, and cushions — to keep your body safe while it heals.
The five poses, step by step
1. Warrior Two
Warrior Two is a lunging posture that strengthens the quadriceps — important because you want to build strength in the supporting muscles that surround the knee joint.
Begin in Mountain Pose: stand tall with your feet about hip-distance apart. If you need something to stabilize your posture — a wall, chair, or walker — use it freely. Keeping the working foot rooted (say it's the left), step the right foot back into a wide stance. Bend the left knee, keeping it pointing in the same direction as your toes, and keep the right leg as straight as possible without locking the knee joint.
As you step back, turn the back foot outward just enough to stay aligned with the back knee and establish a strong base. Keep your center of gravity at your pelvis — you do not want added pressure on the front knee. As you settle into the lunge, three alignment points protect the joint:
- Front knee over the ankle bone or heel. A knee that drifts too far forward puts too much pressure on the joint.
- Front thigh just above parallel to the floor. That depth places enough tension in the quadriceps and hamstrings to stabilize the pose without overloading the knee.
- Back foot pressing firmly into the mat, even at its angle. Let some pressure reach the outside edge of the foot — this engages the back-leg muscles and makes the whole posture stable.
For the classic expression of the pose, extend your arms out over your legs, parallel to the ground; if you need to brace yourself, keep a hand on the wall, chair, or walker instead. Hold for 10 slow, deep breaths, then practice the pose on the other side for an even balance of strength.
2. Tree Pose
Tree Pose is a standing balance posture that aids knee replacement recovery. Because you'll be balancing on one foot, stand near a wall or a high-backed chair, with your working side closest to the support.
Start with both feet planted. Gently shift your weight into the standing foot and root it firmly into the floor to activate the thigh muscles, then engage your core by drawing in your abdominal muscles on an exhale. Once you feel stable, lift the other foot off the ground — flexing that foot keeps the lifted leg active. Turn the lifted knee outward; 45 degrees is sufficient for this pose. Place the foot against the inside of the standing leg and hold for 10 to 20 breaths. Then perform the posture on the other side.
3. Bridge Pose
Bridge Pose rebuilds strength in the leg muscles. It's technically a backbend, but performed with a prop it still effectively activates the glutes, hamstrings, and hip flexors — all areas that support the recovery of your new knee.
Lie on your back and bend your knees with your feet planted firmly on the ground. Ideally your knees sit directly over your ankle bones — but if the recovering knee doesn't yet have that range of motion, step both feet slightly forward. Widen your stance on the mat as needed, keeping your toes pointing the same direction as your knees; this gives you more usable range of motion while keeping the knee joints safely aligned. Practicing with your toes touching a wall adds leverage and stability. On an exhale, lift your hips into the air and hold for 10 to 20 breaths — lifting and holding engages all the leg muscles surrounding the knee.
Two ways to make the pose easier:
- Bend your elbows to 90 degrees and press your triceps into the floor to help hold the body up.
- If the lift feels like a strain or asks too much of your legs, slide a yoga block underneath you to sit on. The block keeps the hips elevated while your body rests between efforts — inhale to fill your lungs, exhale to lift the hips off the block, take three more breaths, then lower back down to the block and repeat.
4. Child's Pose
Child's Pose gently works range of motion in the recovering knee while providing deep relaxation. You'll want two props for this variation: a blanket and a large cushion or yoga bolster.
Come to your hands and knees, with the folded blanket padding your knees. Place the cushion or bolster between your legs or along your calves, then slowly sit back onto it while extending your arms forward along the ground. Rest your forehead on the floor or another soft surface. Depending on your knee's current range of motion, you may not be able to sit all the way back onto your heels — keep your hips lifted as high as needed, letting the cushion take your weight, until you can comfortably relax into the posture. As you're able, stay for several minutes, taking slow, deep breaths to feel a sense of calm through mind and body.
5. Savasana
Finish any practice in Savasana. Simply lie on your back on the mat for several minutes and let the entire body relax. If lying with your legs extended straight isn't fully comfortable, place a pillow, bolster, or rolled-up blanket underneath your knees — the soft bend relaxes the knees and the lower back so you can rest completely. Breathe slowly in and out, letting stressful feelings and thoughts dissipate.
Yoga for the stress of recovery — not just the knee
Recovery after knee replacement can be stressful in its own right. Progress may come slower than you hoped; getting back to normal activities can feel like it's taking a long time. That stress isn't just unpleasant — under these conditions it can actually hinder your recovery.
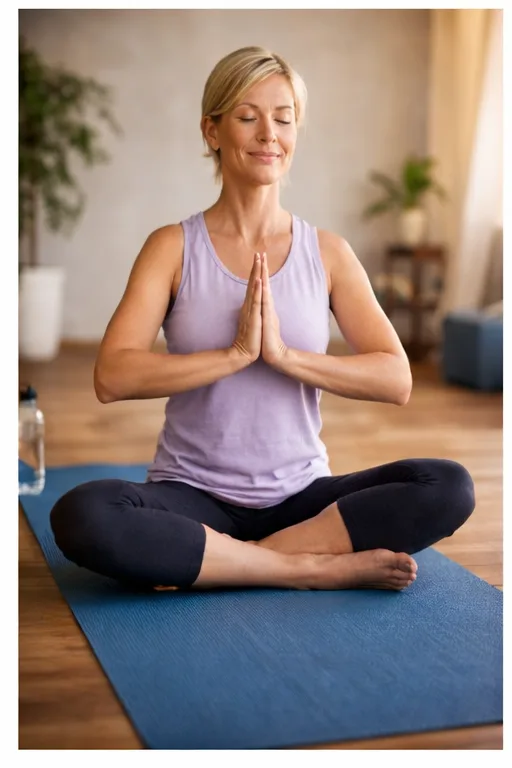
Yoga helps here too. Beyond the poses that rebuild strength and mobility, mindfulness meditation and intentional breathing are proven tools for managing post-surgery stress. Even a few minutes of slow, deliberate breathing — in Savasana or simply sitting quietly — can lower the mental load of the recovery process and keep you moving toward your goals.
How to progress safely
Start with these modified postures to regain mobility, strength, flexibility, and relaxation, and use the recommended props and variations — they aren't shortcuts, they're what makes a faster recovery safe. Take your time before adding intensity: watch and feel for real physical improvements before advancing your practice.
You don't have to progress alone. Dr. Morton's team offers physical therapy at the Honolulu and Kunia clinics, so a therapist can check your alignment pose by pose and keep your yoga practice in step with your healing. If anything about a pose causes sharp pain, swelling, or a sense of instability in the new knee, stop and call the office at (808) 439-6201.
Why yoga practitioners choose Dr. Morton for knee replacement
Getting back to the mat is easier when your surgeon understands what you're returning to. Dr. Morton is a board-certified, fellowship-trained knee replacement specialist who is well-versed in yoga techniques for recovering from knee surgery — and who understands your desire to get back to activity, not just back on your feet.
- Board-certified, fellowship-trained specialist in knee replacement surgery
- Nonoperative and operative treatments available — surgery only when it's the right answer
- High success rate with rapid-recovery, minimally invasive techniques
- Well-versed in yoga techniques for recovering from knee replacement surgery
- Certified on all four surgical robots — ROSA, Mako, CORI, and VELYS
- Physical therapy available through the Honolulu and Kunia clinics
- Clinics in Honolulu (Ala Moana), West O'ahu (Kunia), Hilo, and Kona — call (808) 439-6201
Medically reviewed by Paul Norio Morton, MD, FAAOS, FAAHKS. Last reviewed: . This article is for education only and isn’t a substitute for an exam and personalized advice — schedule a consultation to discuss your situation.